@Kaessa - Good Brief Instructions! That is a great start for a quick answer.
@Poster with question....Since I'm a Graphix Designer and run a team of extremely talented artists, I will include a more in depth look at this here in this post, with some basic instructions.
1. Launch PS
2. Create a new document, and in this case if it's a Icon or DV (desktop visualizer) icon, you will need to have your measurements handy. in this example, I'm going to reference a equilateral square Icon used on the app screen for a shortcut to an app - (equilateral means all sides have same size)
3. Set the size of the icon to 85x85 - 72 dpi or 96 which is usually the best for web and on screen w/ LCD's. You could use 300 dpi, but it's not necessary and the size is larger when you scale with larger dpi.
4. Once you have this set, click the Name at the type and type in a name - Demo Icon for this tutorial
5. Set the color mode in the normal dialog (assuming you are using CS3 or newer) to RGB - 8bit
6. Click the drop down of 'Background Contents' to Transparent, then click OK
7. You should then see an equilateral box on your screen at 85 x 85 with no color in the background , but a bunch of white and grey squares indicating you are looking at the canvas.
8. After you have created this, on the right hand side if you are using the default layout of the Photoshop settings, you will notice the navigator, color, and Layers panel showing all the visible and non-visible layers.
9. To create any thing that is transparent, you will need to create a new layer that sits "above" the canvas layers set as layer 1 indicated by the initial creation of the square icon in the beginning of this tutorial.
10. To do so, move your mouse to the lower right hand corner of the layers window and set your mouse icon over some of the icons. The second icon in the row at the bottom will be "Create a New Layer" click this or if you wish to do hot keys and are on PC do this - Shift - Ctrl - N.
11. now you should see 2 layers in the layer channel window, indicated by Layer 2 and Layer 1 with eyes' to the left , which are clickable , allowing you to make it visible or hide it.
12. Now that you have 2 layers, while keeping the selected layer on number 2, (left clicking the layer name in the layer window will select which layer you are working on, ie, if you left click one time on layer 1, it will highlight indicating you are working on layer 1 and vice versa).
13. to do a little test, we will do something simple, in this case, Fill in the 2nd layer with black, and then create a third layer and type text on it in white , and to round it out, make it semi - transparent.
14. So you have 2 layers , let's fill the 2nd layer, so with the fill tool from the left hand tool bar which should be on the left side of the screen, select the fill or paint bucket icon, and click the white and make it black (by clicking your mouse in the white space down at the bottom of the tools window , it will bring up a color picker, you can choose black for your fill, and if you are advanced just click the front to back arrows and PS will swap background for foreground color, in this case of defaults, Black will now be in front ----your fill color ---- and white in the back ground.)
15. Once you have black selected and the fill tool ( paint bucket ) , ensure you are on layer 2, by clicking one time on the layer name and highlighting it. Move your mouse to the box in the middle of the screen with the grey and white boxes, which is the canvas and left click one time.
The entire contents should fill black.
16. Once you have this done, create another layer as you did earlier in the tutorial which will allow you to create or adjust things and make this look sweet! This will be Layer 3. When you Shift+Ctrl+N , it will create the new layer in the layer navigator.
17. Click on the Layer 3 to highlight it and ensure you are working on that layer for this part. now select the Text tool from the Left Tools Window, and select size 16 and a font. click in the box over the black , and make sure the text color is set to white, you can do this after you have clicked on the T - Text tool, at the top you will see The font type selector, Bold/Italics,etc selector and so forth. Near the middle you will see the font color just after the alignment icons. Clicking in here will let you alter / change the font color. We need it white, so it will show on the black fill we did above. Click it and choose white.
18. When you have selected the font, 16 size and the color white, type some text in the Layer 3 of the box you have on your screen. You should see your sample text , over the black fill of layer 2. Congratulations , you have just created a 3 layer icon, which is compiled of canvas, fill and text. Albeit simple, this is the basis to get started.
19. For the final parts, we are going to make this a transparent Icon. To do so, you will need to after typeing your text, click on layer 2 to highlight in the layers navigator window. Ensure that you are on this, as you will be decreasing the amount of black shown for the icon.
20. To enable transparency like state above we are going to decrease the opacity of this channel or layer. This is also known as Alpha Levels.
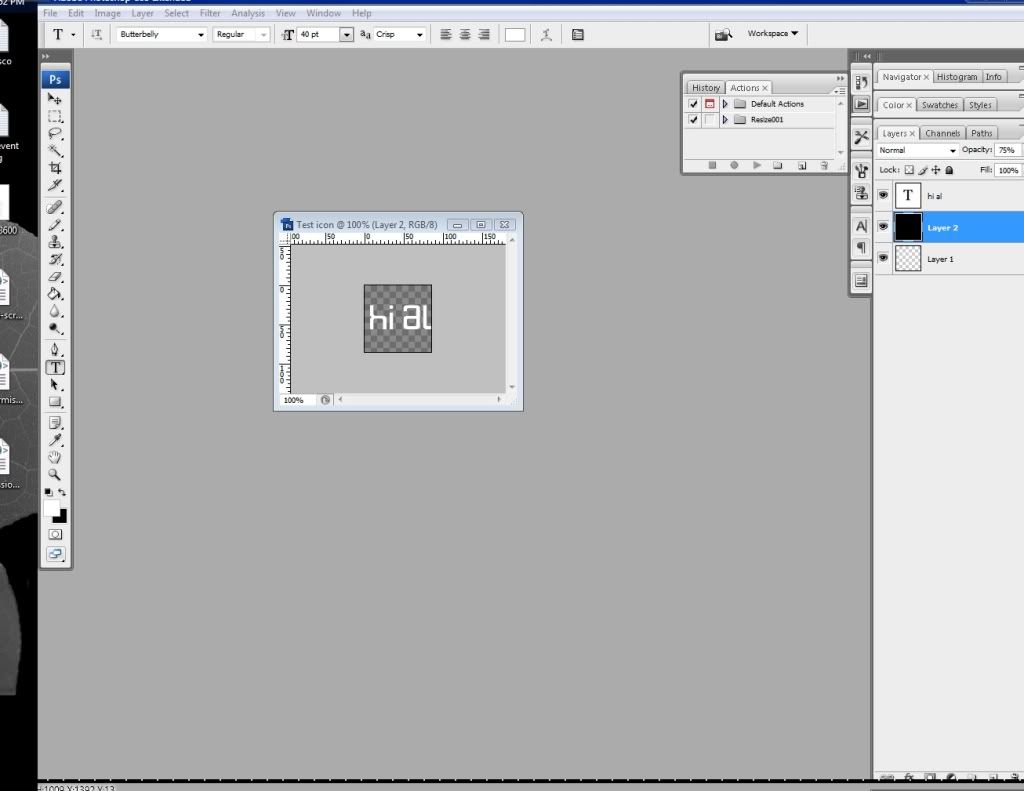
When you have selected the Layer 2 , if you look above the layers listed, you will see the words "Normal" (in a drop down box) , "Opacity" (to the right of that box with a arrow and percentage box) , and "Fill" (under the opacity box also a percentage window). In the Opacity Box % , it should say 100. Delete this value and input 75. This means you are only showing 75% of the black background fill.
21. It should dim out a lil showing the text and the gray and white boxes from the canvas through. This is called transparency. Now you can save the icon 3 layer test you have created as an PNG with transparency by going to File, Save as - PNG for the Type and input the name. Or if you are key savvy, CTRL+SHIFT+S , and it will open the save dialog for you to type the name and select PNG as the type. now your icon will be black, with white text and semi 75% transparent.
22. Congratulations, you now have created a 75% transparent icon w/ text.
If you see the image below, i snapped at the end of this tutorial before saving as PNG.
If you have any questions, email us at fluxboxmedia@gmail.com
or check out the site and email us.
Thanks again for the support!


")


